Setting eSIM for iPhones and iPads
[Important] All the following eSIM settings must be done in Japan.
- If you have other configuration profiles installed on your iPhone, please remove them before this setting.
- Please connect to Wi-Fi when setting.
- The screen images posted on this site may differ from the actual screens depending on the OS version.
* Customers who choose to check contract information by letter needs to access to the URL in the "Contract Information Letter" before this settings. Otherwise you can not use the Internet even if you finish this settings.
STEP 1.
After you arrived to Japan connect to Wi-Fi.
You will receive a push notification saying "You'r eSIM is ready to use". Tap it and proceed to steps 1-2.
If you do not receive a push notification, or "Mobile communication setup is complete" message does not appear, proceed to step 1-1.
* Most of the airports in Japan provides free Wi-Fi
STEP 2.
Tap on "Copy SM-DP+ Address" button.
If it is impossible to download eSIM by copying SM-DP+ Address, please try reading the QR cord.

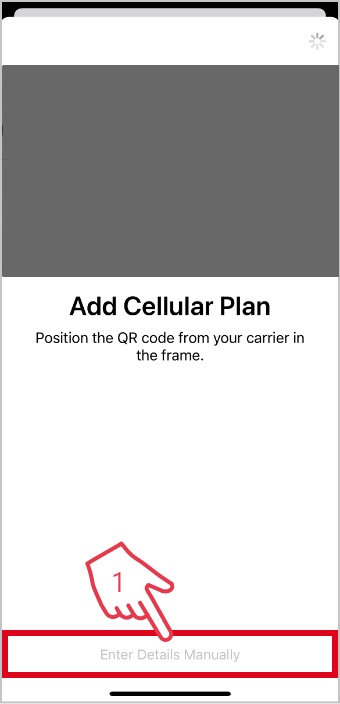
STEP 3.
Go to Setting > Cellular > Add Cellular Plan > Enter Details Manually.
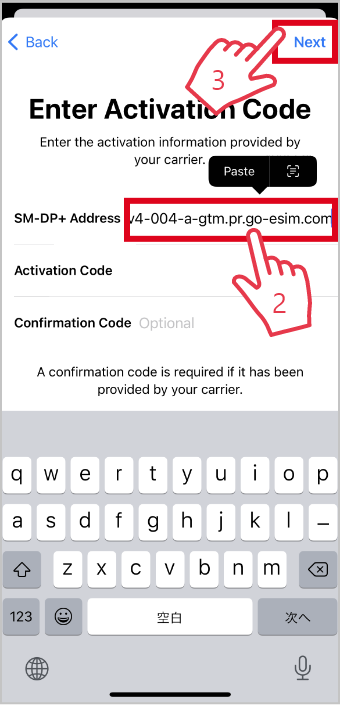
Paste it on SM-DP+ Address section and click Next.
Important: You may add this cellular plan only once and only onto one device.
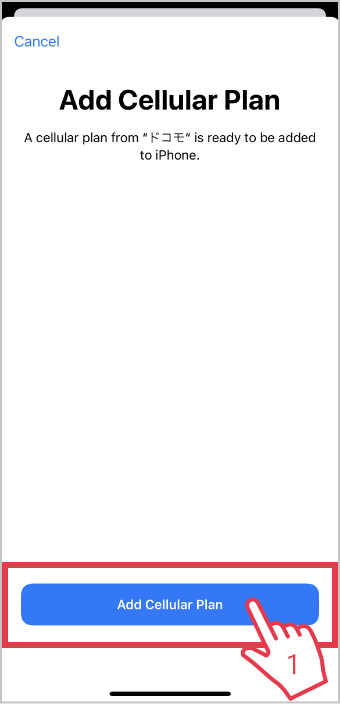
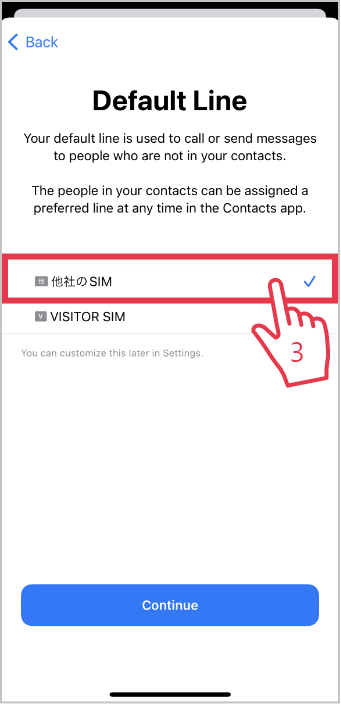
STEP 4.
(1) Click on "Add cellular plan".
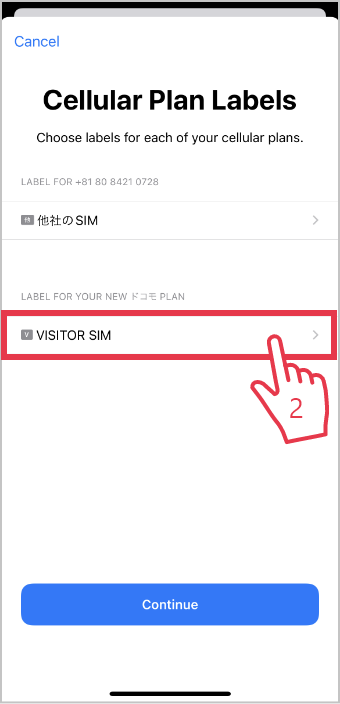
(2) Type in a descriptive name for this eSIM. for example "VISITOR eSIM".
* Customers who only have VISITOR SIM inside the device can skip this step and go to STEP 5.
(3) Choose the SIM you want to use to make a phone call. VISITOR SIM is data service only that you can not make a phone call.
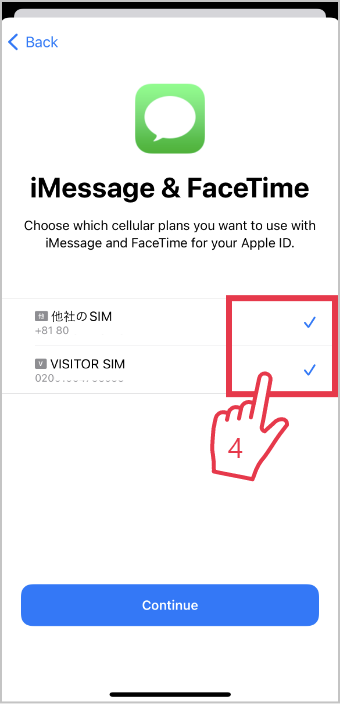
(4) Choose the phone number you want to use when using iMessage and FaceTime.
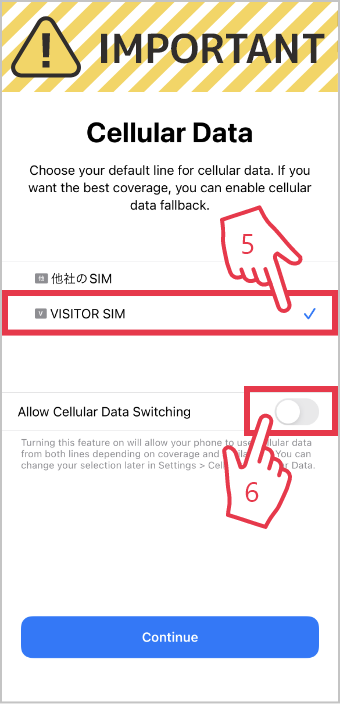
(5) Select VISITOR SIM.
(6) Turn OFF "Allow Cellular Data Switching".
Important: MUST TURN OFF the "Allow Cellular Data Switching" at this point. You can change this setting after you finished all the settings.
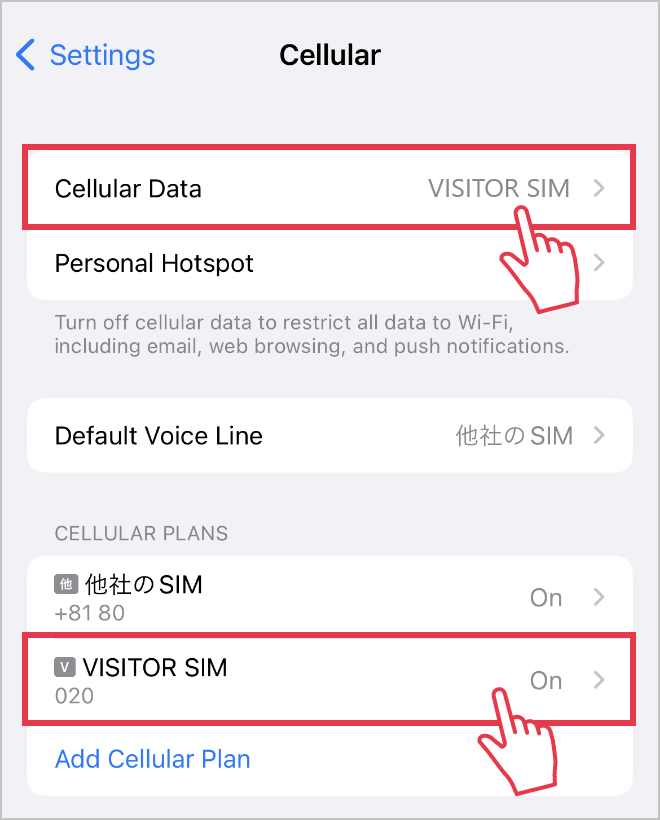
STEP 5.
Check Cellular Data is selecting "VISITOR SIM" and CELLULAR PLANS is "ON".
Important: Please be careful not to remove VISITOR SIM while you are using. It will cost 550 yen to reissue the plan.
STEP 6.
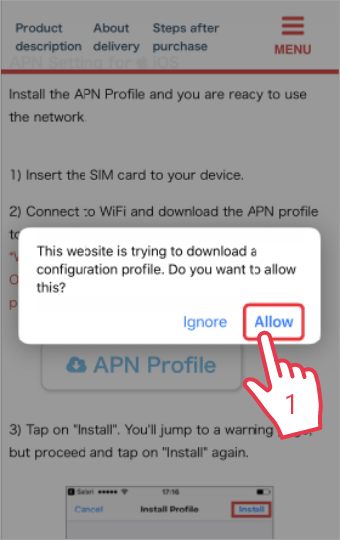
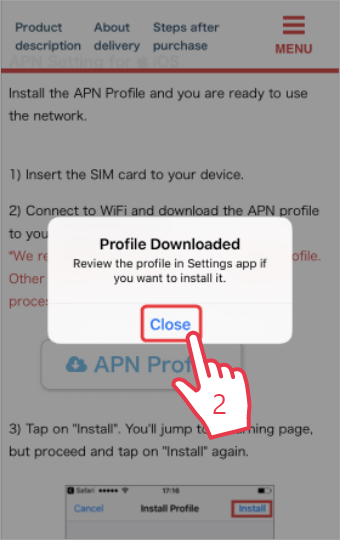
Download APN profile by tapping the button below.
Important: You must use Safari to download the APN profile. If you are opening this page other than safari, please re-open this page with Safari.
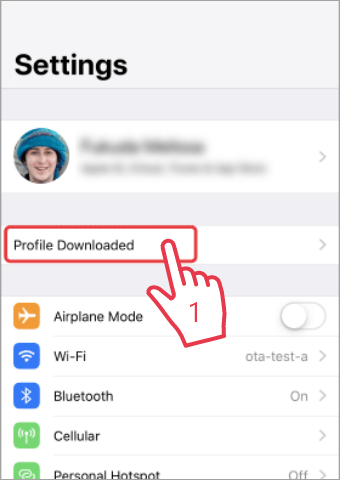
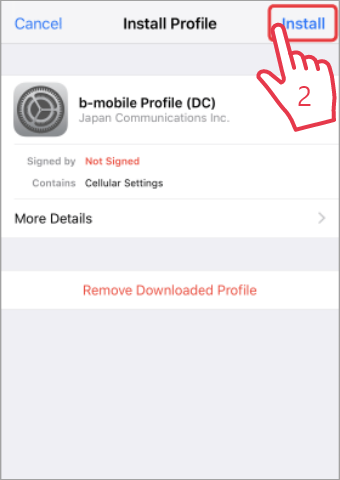
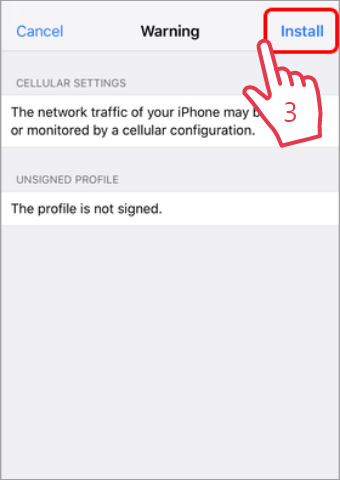
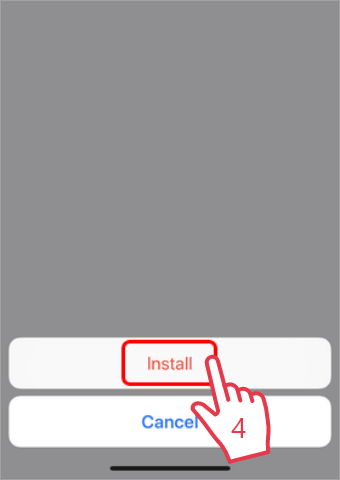
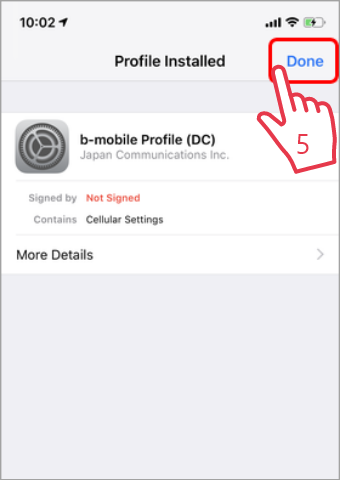
STEP 7.
Install the APN profile.
STEP 8.
Turn Off the Wi-Fi and reboot your iPhone / iPad. After rebooting check if you can use the internet.
If you were able to use the internet turn the Wi-Fi back ON.
If you were not able to use the internet, check the following list.
-Do you see "b-mobile profile (DC) " under Settings > General > VPN & Device Management? If YES, remove this profile and start over from STEP 6. If NOT need to download and install the profile from STEP 6.
- Did you download the APN profile using Safari? If not remove the profile, open this page with Safari and start from STEP 6.
-Turn Off the Wi-Fi and try if you can use the internet.
